Skip to content


How to Make Gold Leaf Christmas Baubles
- by Vicky Stubbs
To make a gold leaf Christmas bauble, brush a thin coat of acrylic gilding size onto a prepared ceramic bauble, wait until it feels dry and tacky, then press on small pieces of imitation gold transfer leaf. Brush away the excess and seal the leaf with a compatible clear finish to help protect it from tarnishing.
For a first project, try an uneven gold band around the lower half. The curve catches the light as the bauble turns on the tree, and a freehand edge gives you room to get used to laying the leaf. Imitation gold leaf is a thin sheet of brass that gives you a warm gold finish at a lower cost than genuine gold. It suits indoor decorations like this one. Read our guide to imitation gold leaf
What you’ll need
From the kit
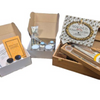
Use the imitation gold transfer leaf, acrylic gold size, application brush and soft gilder’s mop. The kit also contains loose leaf. For this project, use the transfer sheets, which have a paper backing that makes small pieces easier to position. Check the label on the protective finish supplied with your kit before use.
From your craft supplies
You’ll need a plain ceramic craft bauble, a lint-free cloth, sharp scissors, and an egg cup lined with a soft cloth to hold the bauble steady. If you want a coloured background, choose a compatible craft paint suitable for your ceramic blank.
Shop the Imitation Gold Basic Starter Kit
1. Prepare the ceramic bauble
Remove the hanging ribbon if it gets in the way. Wipe away dust and make sure the surface is clean and dry. If you’re using an unglazed blank, check whether it needs a compatible sealer. A porous surface can absorb the size unevenly. If you paint the bauble first, follow the paint instructions and let the base coat cure before gilding.
Try the size, leaf and finish on the underside of the bauble or on a spare blank with the same surface. You’ll see how the leaf adheres and how the protective coat affects the colour before you commit to the design.
2. Brush on a thin coat of size
Gilding size is the adhesive that holds the leaf in place. Brush a thin, even layer over the area you want to gild. Turn the bauble as you work so you can see the wet edge and catch any drips. The leaf will pick up the shape you paint with the size, so use the tip of the brush to define the edge of the band.
Start checking the size after about 15 minutes. Try a small spot on your test area. The size should feel sticky and leave no wet residue. If it still feels wet, give it more time and check again. Wrights Acrylic Gold Size
3. Lay the leaf in small pieces
Cut a transfer sheet into small pieces with the backing still attached. Hold one piece by the paper, place it gold-side down on the tacky size and gently rub the back. Peel away the paper to see where the leaf has transferred.
Rotate the bauble as you work, slightly overlapping each new piece with the last. Use smaller pieces where the paper starts to buckle around the curve. Once the band is covered, sweep away loose fragments with the soft gilder’s mop. Save a few clean scraps for touching up. See our guide to applying imitation leaf
4. Fill any gaps and seal the leaf
Turn the bauble under a light to spot small gaps. If the exposed size still feels tacky, press a small piece of leaf over the gap and gently brush away the excess. If you missed a spot with the size, use a fine brush to apply a little adhesive to that spot and wait for it to reach tack before patching.
Allow the gilding to dry as directed, then apply a clear protective finish compatible with imitation leaf and the products underneath. Follow its instructions for coats and drying times. Once the finish has dried sufficiently for handling, thread the ribbon back through the cap and hang your bauble.