Getting Started with Gilding: A Beginner’s Guide from Wrights of Lymm
- by Sam Wozniak
If you’re just stepping into the world of gilding and restoration, particularly working with genuine gold leaf, monumental surfaces or fine decorative accents, it’s easy to feel overwhelmed by the terminology. Here at Wrights of Lymm — one of the UK’s oldest gold leaf suppliers — we know that a solid grasp of the vocabulary makes a huge difference to your confidence and results. In this post we’ll walk you through the key gilding terms, and give you a structured “where to start” for beginners, especially when using gold leaf for restoration or monumental gilding work.
Why terminology matters
Understanding the language of gilding helps you:
-
interpret product specifications (for example “24 ct gold leaf transfer” vs “loose leaf”)
-
follow instructions accurately (for size times, tack points, bole preparation)
-
communicate confidently with suppliers and restorers
-
plan your project with realistic steps and materials
Since Wrights of Lymm supply both imitation goldleaf and genuine gold leaf from 24ct down to 6ct and specialise in gilding and monumental restoration work, we often get asked for straightforward beginner guidance.
Key Gilding Terms You Should Know
Here are some of the most common terms you’ll encounter when working with gold leaf, restoration or monumental gilding:
1. Gold Leaf / goldleaf
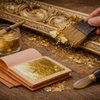
Gold leaf is extremely thin sheets of gold that are beaten from bullion and used for decorative finishes. For many restoration or monumental applications, genuine gold leaf (e.g., 24ct) is chosen for its durability and longevity.
Key details to watch: carat (purity), format (loose leaf vs transfer leaf), size of sheet, and suitability for outdoors or indoors.
2. Carat (ct)
Carat here refers to the purity of the gold. For example a 24 ct gold leaf is nearly pure gold; a 6 ct gold leaf is a much lower gold content. Wrights of Lymm supply a range from 24 ct to 6 ct to meet different budgets and end-uses.
3. Transfer leaf vs Loose leaf
-
Loose leaf: individual sheets of gold leaf that rest between rouged tissue pages in a booklet. They are very delicate and often used for fine indoor gilding.
-
Transfer leaf: leaf adhered to a tissue or backing, making handling easier; often used when gilding large or outdoor surfaces. This format is more convenient for monumental or restoration work.
4. Size
Size (also called gilding size) is the adhesive medium applied to the surface to pick up gold leaf. There are different types: water-based, oil-based, fast-drying, etc. Proper application of size and waiting for tack (the right moment) is critical for success.
5. Tack / Tack point
The “tack point” is when the size is at the correct level of stickiness (tack) to accept the gold leaf. Too early and the leaf may slip; too late and the leaf might not adhere. This is especially important in monumental restoration where environmental factors (temperature/humidity/outdoor exposure) matter.
6. Bole
Bole is a clay-based coating (typically coloured red, yellow or other traditional hues) applied under the gold leaf. It gives a warm glow beneath the leaf and helps adhesion on surfaces such as wood, stone or gesso-prepared frames. Use of bole is common in restoration or high-end gilding projects.
7. Gild / Gilding
To gild means to apply gold leaf (or sometimes metal leaf) to a surface. Gilding is the process of applying gold leaf. For example, a monumental pediment or gravestone might be gilded using genuine gold leaf.
In restoration contexts you might hear: “we will gild the capitals of the columns to restore their original splendour.”
8. Burnish / Burnishing
Once the gold leaf has been applied and set, burnishing is the process of polishing the leaf (often with an agate burnisher) to a high shine. This step is key for achieving the mirrored, luxurious look that gold leaf is prized for. Many restoration/gilding professionals will emphasize burnishing for indoor gilding; for outdoor monumental gilding the finish might remain more satin to better weather.
9. Monumental gilding / restoration gilding
When you see the term monumental gilding it refers to gilding large architectural elements, memorials, tombstones, church spires, or external surfaces with genuine gold leaf. Restoration gilding means renewing or repairing existing gilded surfaces to preserve heritage. In this context the choice of gold leaf, backing, size, and durability become especially important, and Wrights of Lymm have built their reputation in that field.
10. Gilt / Gilt finish
Gilt simply means something has been gilded. A gilt finish is a surface covered in gold leaf or gold-tone coating. In high-end restoration you will often select “gilt frame” or “gilt details” meaning real gold leaf rather than paint.
Where to Begin: A Step by Step Guide for Beginners
Now that you’ve got the terminology under your belt, here’s how to embark on your first project in gilding, whether for decorative accent, signwriting or simple restoration. The process below is geared for beginners but incorporates good practice from suppliers like Wrights of Lymm.
Step 1: Choose your gold leaf and format
-
Decide whether you require genuine gold leaf (e.g., 24 ct) or an alloy (lower ct) depending on your budget and environment (indoor vs outdoor).
-
Choose between loose leaf (for fine interior work) or transfer leaf (easier handling, especially for larger surfaces or outdoor jobs).
-
Check that the product is from a reputable supplier (Wrights of Lymm is UK-based and has history in manufacturing genuine gold leaf).
Step 2: Prepare your surface
-
Clean the surface thoroughly. Remove old flaking gilding, dirt, grease, or incompatible coatings.
-
If doing restoration, ensure stability (e.g., plaster, stone or wood substrate must be sound).
-
Apply bole if required (especially for decorative touch, frames, or gilding over wood/gesso). Allow it to dry to a proper hardness.
-
Seal porous substrates if necessary before size application.
Step 3: Apply the size and achieve tack
-
Apply the appropriate size (adhesive) for your environment (oil size, acrylic size, water size).
-
Follow manufacturer’s instructions (consult supplier literature from Wrights of Lymm or your size provider).
-
Monitor the tack point: press lightly with a clean finger or tool to check for slight stickiness. Ensure no wet film and no dry rigid film.
-
Avoid drafts or dust during this sensitive phase.
Step 4: Apply the gold leaf
-
For loose leaf: use a gilder’s brush or tip to lift the leaf from the booklet and apply it carefully onto the size.
-
For transfer leaf: position the tissue side down (or according to instructions) and burnish lightly so that the gold transfers to the surface.
-
Work methodically, covering each area without gaps. For monumental surfaces you may need scaffolding or extension tools.
-
Use minimal pressure so you don’t wrinkle or tear the delicate leaf.
Step 5: Remove excess and burnish
-
After the leaf has adhered and the size has set sufficient (consult size instructions), gently brush away loose edges or flakes with a soft brush.
-
If burnishing is required (for indoor decorative gilding), use a polished agate burnisher to polish the leaf to high shine. For exterior monumental work, you may opt for a more matte finish to better weather.
-
Inspect the surface for any missed spots or thin coverage and touch-up as required (ideally using the same type of leaf for consistency).
Step 6: Protect your work (especially in restoration or outdoor monumental gilding)
-
For outdoor or highly exposed surfaces (monuments, memorials, architectural features), apply a protective clear coat compatible with gold leaf (check with supplier).
-
Monitor the gilded surface periodically for damage, oxidation (though genuine gold does not tarnish) or substrate failure. Restoration projects often require long-term maintenance.
Step 7: Document & maintain
-
In restoration scenarios it’s good practice to document your materials (which size, which gold leaf, batch numbers if available) and the process you followed, for future maintainers.
-
Keep spare material (e.g., extra leaves) for future touch-ups so that you can match the original finish.
-
Educate yourself on the environment: moisture, pollution, mechanical wear are the main threats in monumental gilding.
Common Beginner Mistakes and How to Avoid Them
-
Applying gold leaf too early or too late: sticking when too wet or sliding when too dry. Always test the tack.
-
Skipping surface prep or using incompatible coatings: gold leaf will reflect the substrate and any faults will show.
-
Using the wrong format (loose vs transfer) for the job: Large outdoor or uneven surfaces benefit from transfer leaf.
-
Burnishing exterior gilding too hard: may remove leaf or compromise adhesion; choose finish based on location.
-
Ignoring maintenance: especially for monumental gilding, periodic review helps longevity.
Why Choose Wrights of Lymm for Your Gilding & Restoration Needs
When you’re investing in gold leaf — especially for restoration or monumental applications — the supplier matters. Wrights of Lymm offers:
-
A heritage dating back to 1840, specialising in genuine gold leaf manufacture in the UK.
-
A comprehensive range from 24 ct down to 6 ct, including formats optimised for outdoor restoration and monumental gilding.
-
Technical advice and support for using gold leaf in challenging environments (important for restoration/gilding specialists).
-
High-quality materials trusted for signwriting, gilding and restoration projects alike.
Whether you’re a beginner embarking on your first gilding project, or stepping into the restoration of a historic monument, choosing the right materials and understanding the terminology will set you up for success.
Final Thoughts
Gilding is a craft, and when done well, it brings a surface to life with the radiance of genuine gold. Understanding the vocabulary – from size and tack, to bole and burnishing – is your first step on that journey. Using high-quality materials from a trusted supplier like Wrights of Lymm ensures that whether you’re gilding a sign, restoring a church spire, or working on a monumental memorial, you’re equipped for success. Start with the right leaf, the right adhesive, the right surface prep, and the right timing – and you’ll unlock the timeless elegance that gold leaf offers.
Happy gilding!


