 Skip to content

Gild an egg for Easter !!
- by Sam Wozniak
Gilding eggs is a beautiful, slightly luxurious way to decorate Easter eggs—adding real metallic shine (gold, silver, copper) for a stunning finish. Here’s a clear, beginner-friendly guide to get you started.
✨ What you’ll need
- Blown or hard-boiled eggs (white shells work best)
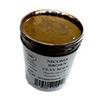
- Metal leaf (gold, silver, or copper)
- Gilding adhesive (also called “size”)
- Small soft brush
- Tweezers (optional but helpful)
- Soft cloth or cotton pad
- Sealant (optional, for durability)
🖌️ Step-by-step process
- Make sure eggs are clean and dry
- If using blown eggs, handle gently
- You can leave them plain or paint a base colour first
- Use a small brush to apply adhesive where you want the metal
- You can do:
- Random patches
- Stripes
- Full coverage
- Let it become tacky (not wet)—usually 5–15 minutes
- Gently place the leaf onto the sticky areas
- Use fingers or tweezers
- Press lightly—don’t worry if it tears (that’s part of the look)
- Use a soft brush or cloth to remove loose flakes
- Lightly buff for a smoother shine
🎨 Design ideas
- Minimalist: White egg + random gold patches
- Half-dipped: Bottom half fully gilded
- Speckled: Tiny flakes scattered across
- Layered: Paint + gilding on top


